Tag Archives: diy

DIY Art Caddy.


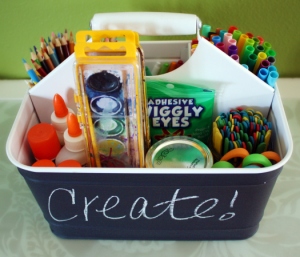
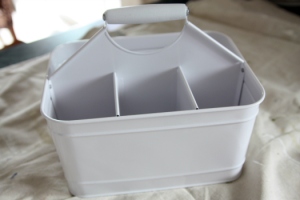
I originally thought when making the boy’s their art caddy for their bedroom, that I would use a combination of pails and a wooden cutlery caddy. But before I even got there, I found a utensil caddy at Target for $11.99 {which was my back-up plan anyway}, and I knew it was by far the best solution and would be moved to my main plan!

Target had a plethora of utensil caddy’s in their summer seasonal section, and the caddy’s were a GREAT size to be used as a caddy for far more than just utensils!
have to use up all that extra chalk board paint some how! One little project at a time! This one really couldn’t be more perfect for chalk board paint though, I mean it’s a kid’s art caddy after all!!
Talk about an easy peasy project! Painting was fun, but more fun ensued when it was time to fill it up with all the kiddos randomly placed art supplies!
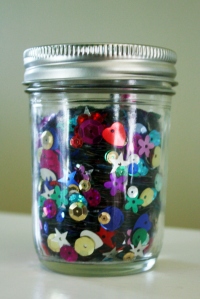
The divided portions of the caddy are great for keeping markers, crayons and color pencils in their respective sections!I snagged some small canning jars for the other odd shaped crafting items:
And tucked those inside the other side of the caddy:
Along with scissors, paint, glue and wiggly eyes! You can’t have an art caddy without wiggly eyes!!
The end result is something that I can tuck up on a shelf in the boys room, and they can easily snag it and carry it to the kitchen table or floor to work on their creative crafty projects! Score, 1 point MOM!
OK, time to spill a secret. I picked up two more of those utensil caddy’s for two more organizing projects that I can’t wait to share! Any guesses as to what they might be?

What other ways have you been whipping up fantastic art storage for your little artists?ArtCaddy1ArtCaddy14ArtCaddy15
Tagged , , , , , ,

DIY Fruit Cups.


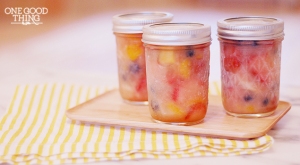
homemade-fruit-cocktail

I found this idea on one of my favourite websites these are great for school lunches.
Just mix 4 cups of your favourite fruit diced,2 tablespoons of lemon juice,3 cups of orange juice.Then combine all ingredients into a large mixing bowl.Mix together well.Then spoon fruit and juice into a mason jar an 8 ounce one until it reaches just below the tip of the jar.You can then freeze these as well and use as needed.Makes 8 jars.These are so convient and easy for kids to eat out of.

Tagged , , , , , , , ,

DIY Wedding Ceremony Programs.


79086F884AF147128233A44CB7D9E38A
3D2CAD986F344B2DAF63EE7F248BE4B0

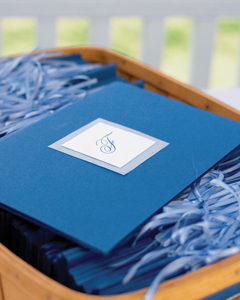
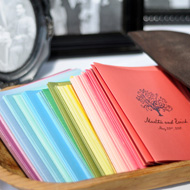
Save money and make your own wedding ceremony programs.These ones are in blue,but you can just choose colours to match your theme.I love diy ,it gives everything a personal touch.It is also fun if you love crafting.

What You Need:
• 8 1/2″ x 11″ navy blue card stock
• 3″ x 3″ light blue invitation liner paper
• 2 1/2″ x 2 1/2″ white paper card stock printed with your monogram
• 20″ to 30″ light blue ribbon (about 1/4″ thick)
• *7 1/2″ x 10″ paper printed landscape-style with the ceremony info
• Mini hole puncher
• Glue or spray adhesive

How to Make Them:
• Fold the sheet of navy blue card stock in half width-wise.
• Glue the light blue paper square onto the middle of the folded navy blue card stock. Let dry.
• Glue the monogram-printed white square on top of the recycled paper square. Let dry.
• Fold the inner page(s) width-wise and tuck into the inside of the blue program cover so that the pages come together like a booklet.
• Close the booklet with the pages still inside, and punch two holes exactly on the fold line and 2″ to 3″ away from the program’s top and bottom.
• Open the booklet and loop the light blue ribbon through the holes. Close the booklet and tie a bow around the outside to bind it together.

* Tip: Don’t have 7 1/2″ x 10″ paper? Use an 8 1/2″ x 11″ sheet for the inner pages — just set the print area for 7 1/2″ x 10″ and then trim the edges after printing. Print pages 1 and 4 on one side and pages 2 and 3 on the other.
Have fun!

Tagged , , , , , , , ,

DIY Heart Garland For Your Wedding.


Smitten1_1
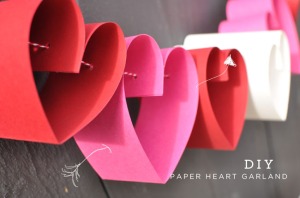
Step 1: Grab a strip of paper and fold it in half. A variety of different size stripes of paper and colors will add some charm to your heart garland, trust us-it’ll be so cute when the hearts are in different weights of chubbiness!

Step 2: While your paper is still folded in half, add double sided tape to the outside of one end.

Step 3: Curl the two ends in until they meet in the middle and form the shape of a heart, then press down so it is secured by the tape.

Step 4: Add 3 hole punches. Add one in the center and one on the left and right side of the heart. Hole punch toward the top so the hearts don’t topple over when strung through with twine.

Once all your hearts are hole punched, just string through some baker’s twine and you’re done! This project is so easy and quick, it will probably take you 20 minutes! xoxo!

Tagged , , , , , , , , ,

Lip Smacking Fun.


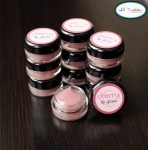
You will need lipgloss pots that you can find at the dollar store.Use some nice paper to make labels for your gloss.
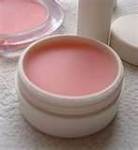
Put about 1 tbls of vaseline or enough to fill your gloss pots , leave a little room at the top.
Put your vaseline in the microwave only until it turns to liquid, about 2 minutes. If your making chocolate gloss start by adding about 1/2 tsp get rid of the lumps first.If you want the gloss darker add more. Then stir well and put in microwave another 20 seconds, stir again.Add to your gloss pot and glue on a nice label.
If you want flavoured, and coloured gloss just add 1/8 of tsp of kool-aid for every 2 tbls of vaseline ,and just mix it up well.Try strawberry, blueberry, or whatever flavour you like. Add to your gloss pots.
You can also just add about 1 tbls of vaseline to a bowl. Then use eyeshadow of different colours. Scrape it into your vaseline and stir until you get the desired colour.
These make great little gifts.

Tagged , , , , , , , , , ,

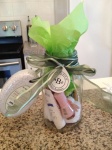
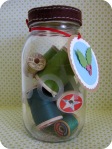
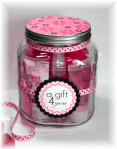
DIY Gift Jars.


Gifts in a jar have become very popular and the possibilities with these gifts are endless.
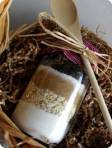
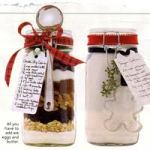
The first idea is cookie mix in a jar,you can use your favourite cookie recipe or use this oatmeal cookie recipe which yields about 24 cookies.You will need a 1 quart mason jar,start with 1 cup of all purpose flour,1/2 tsp baking soda,1/2 tsp of baking powder,and 1/2 tsp of salt ,mix all that together.Use a funnel and pour the flour mixture into the bottom of your jar.Press it down until it won’t pack anymore.On top of that put in 1 cup of rolled oats,be sure to pack each layer down.Then mix 3/4 cups of brown sugar with one1 tsp of cinnamon mix well,and spoon it on top of your oats.Then add 1/4 cup of sugar in your jar,1cup of raisins on top of your sugar,1 cup of walnuts on to of your raisins.Seal the jar and decorate with ribbon..Add your instructions to a piece of cardstock and attach to your jar.Use clear packing tape,or hole punch it ,and tie onto your jar with ribbon.Instructions:pre-heat oven to 350 F.Beat together 1/2 cup of butter,1 egg,1 tsp of vanilla,and 1 tbls spoon of milk.Add cookie mix and blend.Drop tbls rounds of dough onto ungreased cookie sheet.Bake 9-11 minutes.Enjoy!
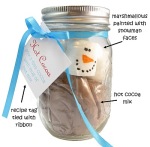
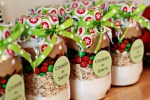
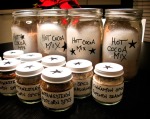
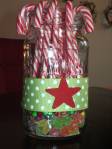
These pictures I found have me inspired ,try homemade hot cocoa mix and put them into baggies inside your jar and add a few big marshmallows.This looks so nice.So the ingredients you need is 2 cups of non fat dry milk,3/4 cup of sugar,1/2 cup of unsweetened cocoa,1/2 cup of semi sweet chocolate chips,1/2 cup of powdered non dairy creamer,and 1/8 tsp of salt.Mix until well blended.Makes 4 cups of this mix.The chocolate chips give this drink an extra rich flavour.You could also tie a spoon to the outside of your jar with ribbon.Add your instructions onto cardstock which are 3-4 tbls of cocoa mix in your cup and add boiling water and stir.You could also add some mini candy canes inside the jar.
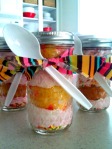
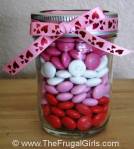
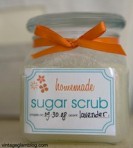
You can add snack mixes boughten or homemade,candies layered in different colours looks really nice,homemade body scrubs try the brown sugar scrub I have posted on my blog.I love the manicure and pedicure jars just add some tissue paper to the bottom of your jar add two bottles of nail polish along with toe nail clippers.Attach a nail file to the outside of your jar with ribbon.You can add make up into the jars.You can do little sewing kits in them.As I said the possibilities are endless and inexpensive to do.
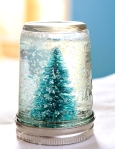
Snow globes also make neat little gifts.Just attach a christmas tree a mini one of course inside the top of your lid with hotglue,you can do this with polish,lip glosses as well glued to the inside of the lids.Then add different coloured glitter to the jar or stick with white glitter for snow then fill with water,,and attach your lid.These make cool glam gifts as they call them.
I love these ideas very neat little thoughtful gifts,but still within your budget!

Tagged , , , , , , , , , , ,

Christmas On A Budget.


Christmas is coming up soon and as far as I am concerned has become too commercial.We spend way to much money,and end up suffering for it the rest of the year.Especially when the credit card bills start coming.So I will be coming up with many simple handmade gift ideas that people on your list will appreciate.
The first one is a custom made notepad this is great for just about anyone on your list,and is especially a good gift for teachers.Go to http://www.goodlookcookbook.com/2011/teacher-appreciation-ideas-html for a tutorial to make your own notepads.Then just add a nice pen,and put it into a decorative type box.Makes really cute gift.
I love this second idea glass tile pendant necklaces.You can make each one unique to suit any of the gals on your list.They look so good,no one will ever guess you even made them.Go to http://www.theidearoom.net/2009/04/glass-tile-pendants.html to learn how to make these creative gifts.
The third one is fabric covered notebooks these are really cute,and the possibilities are endless.You can personalize the notebooks for each person.Go to http://pm-betweenthelines.blogspot.ca/2010/12/diy-gift-ideas-5-fabric-covered.html.
These are three very unique ideas for everyone on your list,and very inexpensive to help you stay within your budget.

Tagged , , , , , , , , , , , , ,

Simple Homemade Spa Baskets.


Make several spa baskets for the girls on your Christmas list.You will need small baskets, how many will depend on how many you want to make.Also try to buy baskets second hand, and spray paint if needed.
You will need baggies for your homemade bath salts, recipe to follow.Epsom salts,a towel,and face cloth for each basket buy a whole set if your doing several baskets.Try to buy everything in bigger packs.A pack of candles,bars of soap you can buy at the dollar store a quarter each bar.A roll of ribbon ,and card stock.Loofah sponges usually come in three packs for a buck.Buy a big bottle of bubble bath and some travel size containers,or use some you already have to pour bubble bath into smaller bottles.Use some perfume you already have for your bath salts.
To make bath salts put epsom salts into seperate bowls with your desired amounts.You can do red and white for a candy cane look,or one orange,pink,blue,white,and green.Just add a couple of drops of food colouring to each bowl and mix well.Then add a few drops of perfume to each bowl and mix well.Spread the salts onto a cookie sheet covered with wax paper and let dry a few hours.Then transfer into small baggies about half full,and tie with a ribbon.
Then put your baskets together add 5 little bags to each basket of bath salts,a candle,a rolled up towel,and cloth,a loofah sponge,bubble bath,and a bar of soap.Each basket will cost about five bucks.
Try brown sugar scrub treat as well to add to your baskets the recipe is at http://savedollarblog.com/?s=brown+sugar+scrub
Also try oatmeal bath bags which are really pretty to add to your baskets also the recipe is at http://savedollarblog.com/2012/10/07/pretty-diy-oatmeal-bath-bags/
Also if you would like to make body scrub,lipbalm,bath fizzies,and bath snow balls with free printables go to http://www.i-do-it-yourself.com/2009/08/diy-homemade-spa-gifts/
People on your list will appreciate this homemade gift.Who doesn’t love a spa basket to pamper yourself with.It is easy and affordable.The possibilities are endless.So you can make cute little spa baskets for everyone and stay within your budget.
What are some of your homemade spa recipes?

Tagged , , , , , , , , , , , , , , , ,

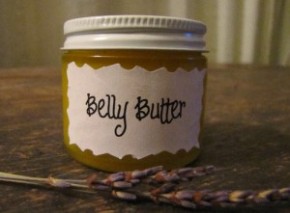
Mama’s Belly Butter.


ImageImage

Expecting a baby,or do you know someone who is,make this homemade belly butter to avoid those nasty stretch marks.Going to a baby shower give this to the mom to be as a gift.Just put it into a nice jar with a ribbon,and attach the recipe.I’m sure she would appreciate this thoughtful gift.Apply daily during your pregnancy.You will be stretched to the limit!

  • 1/2 cup cocoa butter
  • 2 Tbsp. wheat germ oil
  • 2 tsp. sesame seed oil
  • 2 tsp. apricot kernel oil
  • 2 tsp. vitamin e oil
  • 4 tsp. grated beeswax
  • 2 tsp. vanilla extract

Directions:

Put all ingredients in saucepan, except vanilla. Warm over low heat until cocoa butter and beeswax are melted. Stir well. Remove from heat stir and in vanilla. Cool briefly. Pour into glass jar. Leave lid off until completely cool.

Tagged , , , , , , ,